Looking for the BEST way to hold, organize or store your baubles and beads? What about a space to display your favorite photos? Need ideas on how to get those treasured pieces off your valuable counter space? I did too! And I think I created the perfect DIY, upcycled, farmhouse style frame for holding and organizing your jewelry OR photos using items you probably already have around the house!
This post may contain affiliate links. See our affiliate disclaimer here.

My costume jewelry collection is really starting to get out of hand. I needed to come up with a solution that would organize my baubles AND not take up valuable counter space. There really wasn’t much commercially available (in my taste) so I devised a really great DIY solution utilizing wall space and materials already on hand.
While I was making this piece I also saw another use; photo display. I have to admit I am also out of space when it comes to display spaces for snapshots. I really like the versatility of this DIY project which can be completed in about an hour or two.
First I’m going to talk about how you can make this project for photo display. It’s a simple to make this frame into a jewelry holder/display for craft fairs which I will talk about near the end of this post. In any case, here is what we’re striving for:


DIY Vintage Frame Photo Display Materials List:

- Large old wood frames (These can easily found in ample supply at your local thrift store. Look for wood frames with no glass or backing if possible because we won’t be using these parts in the project. Empty frames are often more deeply discounted at thrift stores)
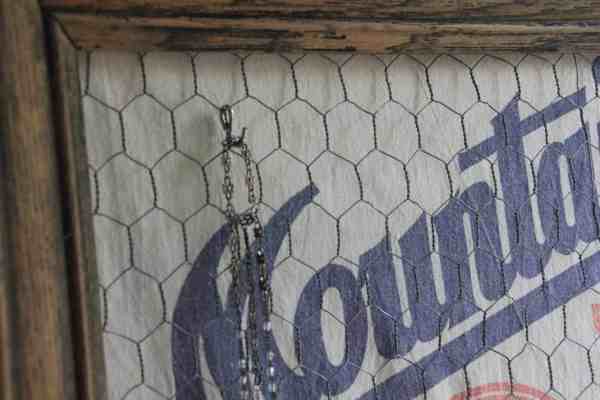
- Chicken wire (or hardware cloth is an option if you prefer for a more modern/clean look).
- Upholstery binding
- Grain Sack Towels (or an old grain sack if you have one)
- Hot glue gun
- Mini-clothes pins
- Tape measure
- Staple gun
- Wire cutter (or sheet metal cutters in a pinch)
- Needle nose pliers
- Flat spray paint (optional if you want to paint your thrift store frame)
- 1″ S hooks (if you’re turning this into a jewelry holder or display)
The first thing you’ll want to keep in mind is the size of your frame vs. the size of your grain sack. You’ll want your grain sack to fit nicely within the frame. If you don’t have a frame on hand be sure to take your grain sack with you to the thrift store to find the right sized frame.
If you haven’t read my post about maximizing your savings at thrift stores like Goodwill and Value Village, head over HERE now!
You may find the colors of thrift store frames undesirable to say the least. Look beyond colors and don’t be afraid to get out the spray paint to match the frame’s color to your personal taste/style. You’ll need to find a wood frame that will hold staples. If you are going to paint or distress the frame, do that now.

First, measure the back of the frame to size a piece of chicken wire (or hardware cloth if you choose) to the frame. Use wire cutters or sheet metal cutters to cut the chicken wire. Ideally you want the chicken wire to fit inside the area where the glass and backing would normally be. This isn’t always possible due to the sizing of your frame vs. the size of the chicken wire. It’s okay for the chicken wire to spill onto the back of the frame. The important thing is to have enough material for a staple to grab your chicken wire and secure it to the meaty part frame.

Place the chicken wire on the back of the frame and use the staple gun to attach the chicken wire to the frame. If you have a pneumatic nail gun that can shoot staples you can use that as well.

Use the needle nose pliers to curl sharp ends of the chicken wire.

Place/center your grain sack on the back of the frame and pin in place with straight pins. Tightly staple the grain sack to the frame. Use upholstery binding to cover up the ends of the grain sack and the ends of the chicken wire. Affix the binding with a generous amount of hot glue. This will prevent accidental pokes from the sharp ends of the chicken wire. This will also prevent the sharp ends of the chicken wire from scratching paint on your walls.

Hang your frame and use the miniature clothes pins to display your photos!
Jewelry Holder/Display Instructions
If you want to use your frame to hang jewelry there are just a few additional steps. You’ll need some small S shaped hooks. In this project I used 1″ zinc plated S hooks. Use your needle nose pliers to close one end of the hook. The goal here is to close the hook enough such that the hook doesn’t fly off of the chicken wire every time you remove a piece of jewelry (but not so tight that you can’t get the hook on the chicken wire). If you’re confident about where you want your hooks then you can close them completely with the pliers AFTER hanging them on the chicken wire so they don’t come off.


I think this could make a really great display for craft fairs…maybe an inspiration board? Be creative with your materials! Almost anything could be used in place of the grain sack so get creative with fabric scraps or remnants. I hope you enjoyed this easy DIY!

P.S. Don’t forget to pin this post for later!

A glue gun in one hand, a whisk in the other- that's me in a nutshell! I'm the heart and soul behind acountrygirlslife.com. I've been crafty since childhood so I'm your go-to girl for everything crafty, delicious, and DIY. From clever crafts & printables to mouth-watering bakes- I believe in sprinkling a little handmade magic into every day. I'll help you find your creative niche at home!


Leave a Reply