

Are you looking for a step by step tutorial for how to make a cute paper plate pumpkin for Halloween? Maybe you’re looking for a FREE paper plate pumpkin template or stencil so it looks really professional? Looking for Halloween paper plate craft ideas? Well, you’ve come to the right place!
We’re going to show you the entire step by step tutorial for making these super cute, pastel Halloween pumpkin pails that can be stuffed with all sorts of Halloween treats! This paper plate pumpkin idea is perfect for kids, teens or adults (hey…I’m an adult woman and I thought this was AWESOME!).
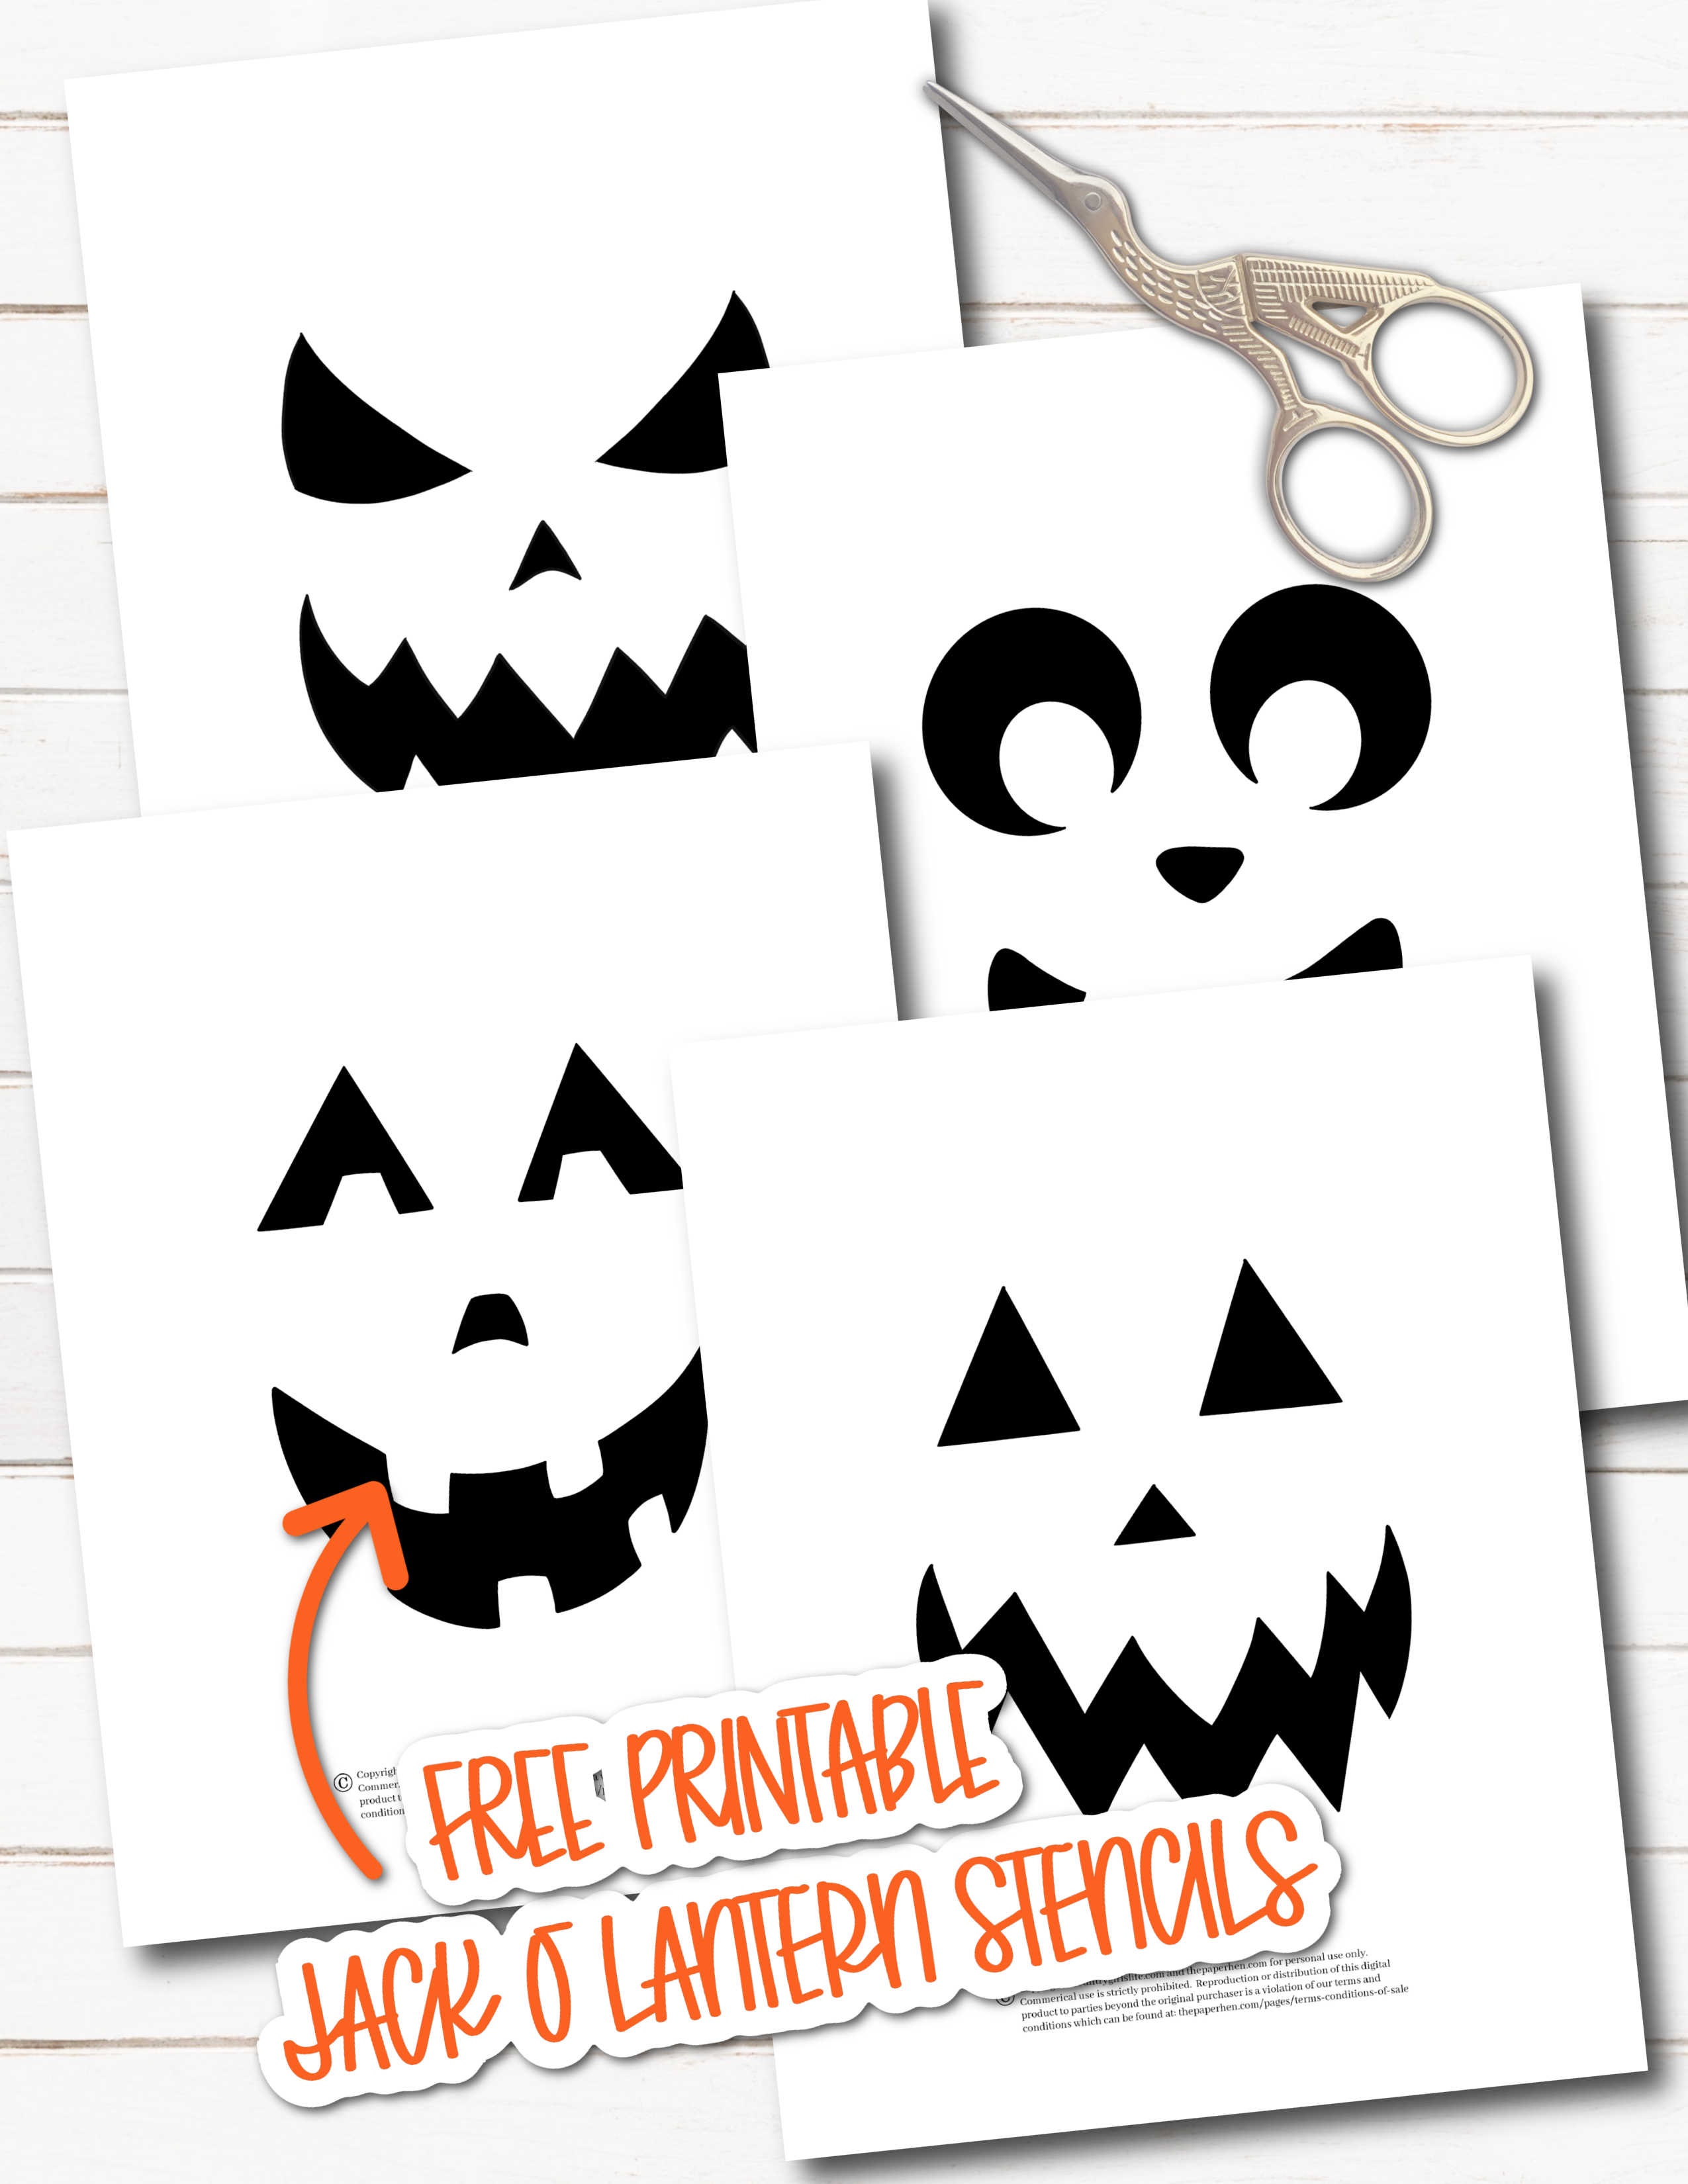
This complete tutorial will show you how to use our free printable pumpkin carving stencil templates to get the PERFECT jack o lantern faces on your pumpkin pail. You’ll have several faces to choose- from totally cute to spooky!
Our finishing touches make this paper plate jack o lantern look well thought out! So be sure to check out the entire tutorial. You’ll also be able to download our FREE printable paper plate pumpkin stencil after the tutorial from our printables library.

We didn’t use traditional colors for this Halloween paper plate craft but you can make theses pumpkins any color you want by substituting any colors you like.
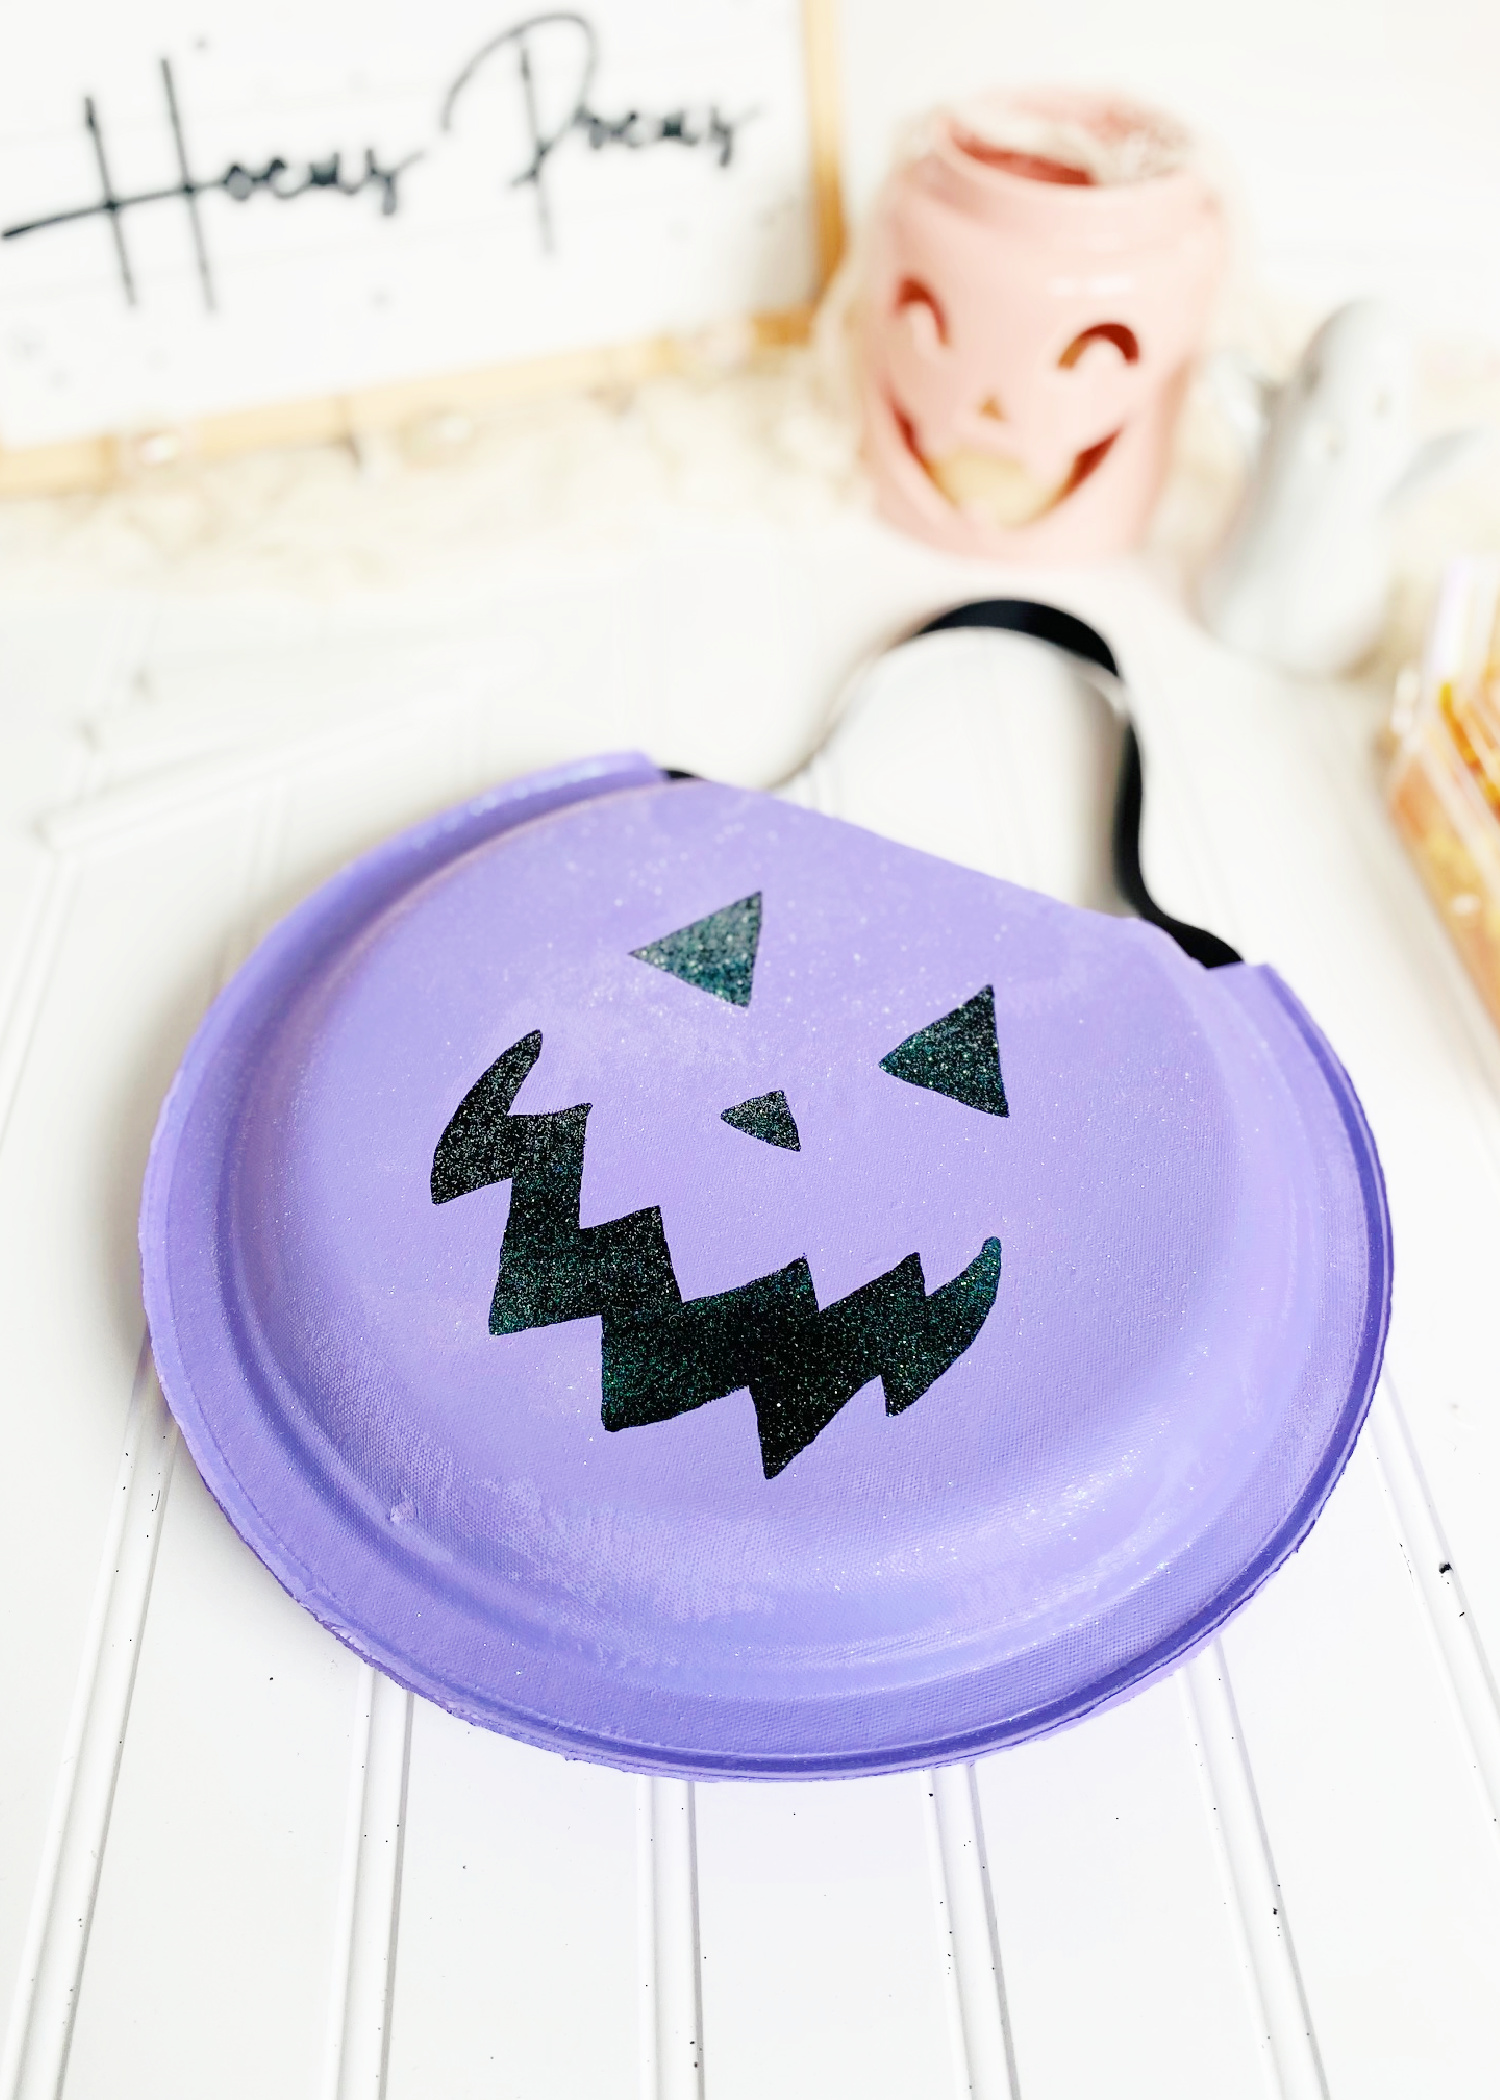
Your imagination is the only limitation! Take some creative liberties to make your paper plate Jack o Lantern totally your style! Okay…let’s see how the final Mickey Mouse Pumpkin turned out!


How Cute is This EASY Paper Plate Pumpkin Pail!?!?


DIY EASY Paper Plate Pumpkin Supplies
This super cute and on trend paper plate pumpkin craft idea comes together quickly with a few crafting supplies you might already have on hand. You can use our FREE printable pumpkin template | stencil to easily create the perfect pumpkin! Note that we used thick, heavy duty Chinet dinner sized paper plates so our trick or treat bucket would hold lots of candy and surprises!
Materials:
- Chinet Heavy Duty Dinner Plates
- Plaid Acrylic Paint in Gloss Black, Peachy Pink, Golden Sunset & Lavendar
- Holographic White Fine Glitter
- 1/2 Inch Black Crossgrain Ribbon
- Matte Modge Podge
- Exacto Knife or Finger Tip Knife
- Hot Glue Gun
- Paintbrush
- Scissors
- Pencil
- Tape Measure or Ruler
- Printer
- Halloween Trick or Treat Candy and Treats
- Our FREE Printable Jack O Lantern Stencil Template (download at the bottom of the page)
How to Make a Paper Plate Pumpkin Pail

STEP 1: Paint the Back Side of All Paper Plates
Gather all of your supplies and let’s get started! Flip over all of your Chinet Heavy Duty Dinner Plates and paint the back side of the plates with the acrylic paint and your paintbrush. I used two coats for this project. These Chinet Heavy Duty Dinner Plates soak up a fair amount of paint and it seemed like two coats looked best.

I used trendy colors for my pumpkin pails but you can use colors that are more traditional or speak to you! The brighter the better I always say!

STEP 2: Print and Cut Out The FREE Printable Pumpkin Template | Stencil
Print out the FREE printable pumpkin face templates and cut out the black areas with an Exacto Knife or Finger Tip Knife. Trim the overall stencil down to a manageable size so you can align it with the paper plate more easily than a full size sheet of paper.


STEP 3: Trim off Top of Plate to Make A Pumpkin Pail Shape
In this next step we are going to cut away a portion of the pumpkin off so that so that it will look like those traditional trick or treat pumpkin pails of our childhood. This requires a bit of a shaping with a pair of scissors. I found it best to make a curved cut to start and then straighten it out across the top…and finally make a curved cut to finish it off. You can use the portion you have cut off as a template for future cuts so they all look pretty uniform.

STEP 4: Align & Outline The Jack O Lantern Face With Template Stencil
Next we’re going to outline the jack o lantern face with a pencil using the FREE printable pumpkin face stencils from our printables library. When you place the stencil on the paper plate do some quick measurements and make sure that it is aligned with the top of the pail and is centered on the paper plate. Tape down the template if you’re worried about it moving.

STEP 5: Paint in the Jack O Lantern Face on the Paper Plate
Next, we’re going to fill in the jack o lantern face with black glossy acrylic paint. If you don’t feel like you have a steady hand you can outline the jack o lantern face with a black paint pen or black sharpie marker and then fill in with a paintbrush. Wait for the paint to fully dry before moving to the next step.

STEP 6: Modge Podge The Front of the Paper Plate Pumpkin
Using a paintbrush, apply Matte Modge Podge to the entire face of the pumpkin (including the sides/plate rim).

STEP 7: Add Glitter!
Quickly spread glitter all over your modge podge before it has a chance to dry. If you have a glitter spray bottle, this is a good application for it because it will distribute a light even coat of glitter all over your pumpkin. If you want the glitter to adhere really, really well you may want to add a follow up coat of Matte Modge Podge to seal all the glitter to the plate.


STEP 9: Hot Glue The Ribbon to Create the Handle
Cut a piece of 1/2 Inch Black Crossgrain Ribbon that is about 12-14 inches long. Hot glue each end to the inside of the backside paper plate. Make sure you have about 2 inches of ribbon fully glued down to the plate- this makes the handle stronger so you can carry it around.
STEP 10: Hot Glue The Two Halves Together
Next, hot glue the frontside paper plate (with the jack o lantern face) to the backside paper plate. Use glue along the entire rim of the paper plate including the areas covered with the 1/2 Inch Black Crossgrain Ribbon. Quickly press down all the way around the rim of the two plates to adhere.

STEP 11: Paint Edges of Plates & Embellish as desired
As you can see we have a nice little pocket for spooky treats and a handle to carry them around with! The final step is going over the exposed outside edges of the plates with some purple paint so it looks cohesive and totally professional.

I hope you enjoyed learning how to make our paper plate pumpkin pail! Our FREE printable jack o lantern template is located inside of our FREE printables library. Instructions for how to join and get the password to our huge printables library are below. You can find the pumpkin carving template download PDF in the holidays section of our library.
If you love Halloween crafts and DIYs as much as we do you might want to check out some of our other fun and spooky tutorials like:
DIY Halloween Nightmare Catcher
Colorful Tassel Ghost DIY Garland
DIY Sweater Pumpkin Tutorial (the easy way)
Hocus Pocus Sanderson Sisters DIY Luminary Jar +FREE SVG
Main Street Mickey Mouse Foam Pumpkin DIY + FREE STENCIL
Classy Dollar Tree Halloween Decor & Crafts


Save This Halloween Paper Plate Craft for Later on Pinterest!

